
Requesting SSO Setup
Start by reaching out to your Customer Success Manager to ensure your current plan allows SSO setup. Then loop in the Support Team and ask them to kickstart the process.
✍️ Synthesia only supports SP-initiated login (not IdP-initiated).
Step 1: Configure the connection between your Identity Provider (IdP) and Synthesia’s SSO service provider.
After the support team sends you the setup link, please click on it and follow the Admin Portal instructions
You will see a list of the IdP providers available. Choose the one you need and follow the corresponding step-by-step guidelines on how to configure the IdP settings.
Once done, you will be able to test your SSO integration with that identity provider.

Okta Configuration Example
Okta Configuration Example
Step 1: Create a SAML Integration
Sign in to the Okta admin console.
In the left navigation menu, expand the Applications section and select the
Applications tab.

Click Create App Integration.

In the Create a new app integration dialog, select SAML 2.0. Click Next.

The Create SAML Integration wizard will open. On the General Settings step, enter an appropriate app name, such as "Synthesia". Optionally, you can upload an app logo. Click Next.

On the Configure SAML step, locate the Single Sign-On URL and Audience URI (SP Entity ID) fields. Copy the values shown in the WorkOS Guide and paste them into their respective fields in the Okta admin console.

Scroll down to the bottom of the page, then click Next.

Step 2: Submit Application Feedback
On the Feedback step, check the This is an internal app that we have created option. Click Finish.

Step 3: Set Identity Provider Metadata
Choose either Dynamic configuration (recommended) or Manual configuration (enter identity provider details).
On the Sign On tab, in the Metadata details section, locate the Metadata URL. Click on the Copy button.

Paste the value into the Identity provider metadata URL field in the WorkOS setup guide to continue to the next step.
Step 4: Configure SAML Attributes
Depending on which features have been enabled on your Okta instance, SAML attribute configuration can be located in different areas of the Okta admin console.
On the application settings page, ensure that the Sign On tab is selected.

Scroll down to the SAML Attributes section.
Click Edit.

Add the attribute statements listed below. The name format can be left unspecified.


Click Next. On the final step of the wizard, click Finish.

Step 5: Assign Groups to the SAML App
On the application settings page, select the Assignments tab. Click Assign and select Assign to Groups.

Assign the appropriate groups to the application. When you are finished, click Done.

Step 6: Test Single Sign-On
Test signing in with Okta at the last stage of the WorkOS guide to verify that the single sign-on connection was configured correctly.
Entra/Azure Configuration Example:
Entra/Azure Configuration Example:
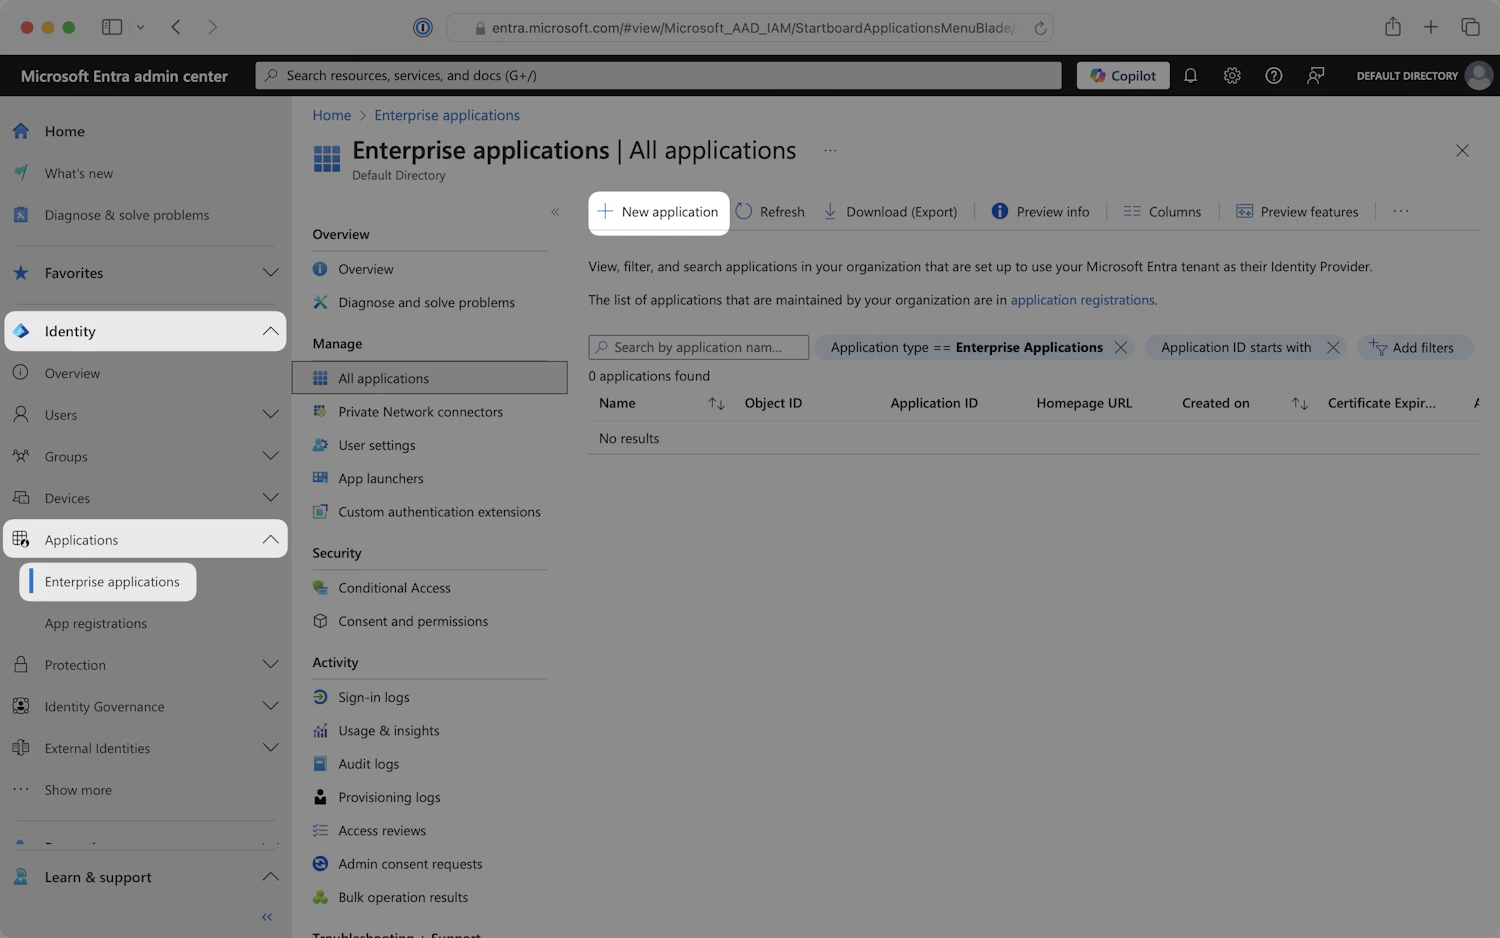
Step 1: Create an Enterprise Application
Sign in to the Microsoft Entra admin center.
In the left navigation menu, expand the Identity section. Expand the Applications sub-section. Select the Enterprise applications tab. Click New application.
On the Browse Microsoft Entra Gallery page, click Create your own application.
Enter an appropriate app name, such as "Synthesia". Select the Integrate any other application you don’t find in the gallery (Non-gallery) option. Click Create.

Step 2: Basic SAML Configuration
In the left navigation menu, select the Single Sign-On tab. Click on the SAML tile.

The Setup Single Sign-On with SAML page will open. Locate the Basic SAML Configuration section. Click on the Edit icon in the top right corner of the step.

Copy the Identifier (Entity ID) and the Reply URL (Assertion Consumer Service URL) from the WorkOS guide setup link you received and paste them into the Basic SAML Configuration panel. Click Save. Close the edit panel.

Step 3: Configure Attributes and Claims
Locate the Attributes & Claims section. Click on the Edit icon in the top right corner of the step.

Ensure that the required claims listed below are configured. The claims may or may not already be configured, depending on your current configuration.

Below is an example of how to format your claim within the Azure claim editor. Make sure to add the Namespace and check that the namespace value ends in /claims.


Step 4: Assign Users and Groups
In the left navigation menu, select the Users and groups tab. Click Add user/group.

Select appropriate users and groups to add to the SAML application.

When finished, click Assign to add the selected users and groups to your SAML application.

Step 5: Add an Application Logo
Optionally, you can add a logo to serve as the app’s entry point on the Microsoft Entra My Apps portal. Including a logo helps users easily identify and access Synthesia.
In the left navigation menu, select the Properties tab. Locate the Logo field. Click on the blue folder icon to upload the logo image. Click Save.

Step 6: Set Identity Provider Metadata
Choose either Dynamic configuration (recommended) or Manual configuration (enter your identity provider settings).
In the left navigation menu, select the Single Sign-On tab. Scroll down to the SAML Signing Certificate section. Locate the App Federation Metadata Url. Click on the field to copy.

Paste the value into the Identity provider metadata URL field in the WorkOS setup guide to continue to the next step.

Step 7: Test Single Sign-On
Test signing in with Entra ID to verify that the single sign-on connection was configured correctly.
Step 2: Testing and Enforcing SSO.
When you finish the setup, you should get the SSO successful test notification, which would mean that the connection between WorkOS and your IdP was established:

After that, please reach out to the Synthesia Support Team, who will send you a test login link to try accessing your account with SSO and after you confirm a successful attempt, they will be able to enforce your SSO on production.
Notes
The example images show setup.workos.com, but in practice, the URL will be setup.synthesia.io.